K7UA DXers Handbook

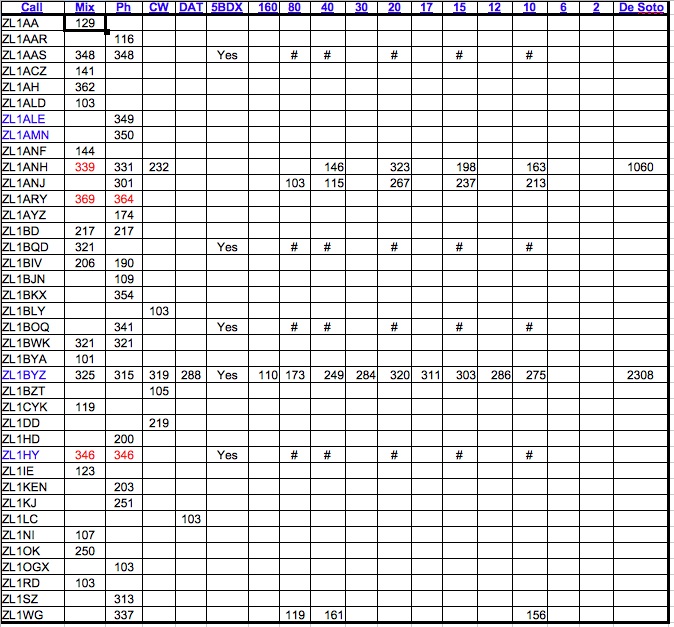
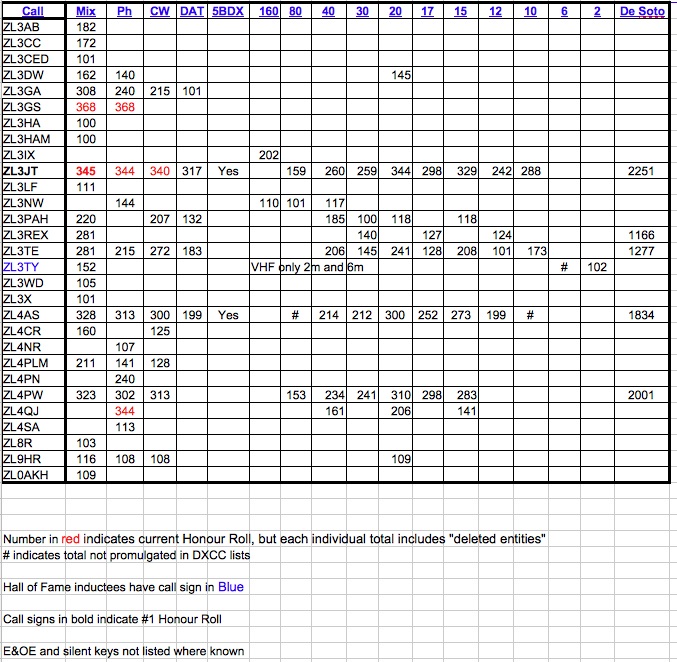
Bryce, K7UA has just revised his original handbook, This is a “No Nonsense” straight forward manual on all things DXing and how to go about working DX.
Free Download here: K7UA DXers Handbook

K7UA's DX Handbook

K7UA’s DX Handbook

His methods, ideas and tips are invaluable if you want to achieve more than what you may be doing now. Bryce has been there and done that with most of the top awards and has worked 340 DXCC Entities. His wealth of experience is invaluable to both new and seasoned DXers. The Index of topics is below:

Index

Index

His handbook is absolutely free to download here  K7UA DXers Handbook – 2nd Edition  and is well worth reading.

73, Lee ZL2AL


11M Tiltover Antenna Mast

This design actually began when we bought another house and moved about 8 years ago. The house had a patio with a louvered roof supported by the house on three sides and with a wooden 4″ x 4″ square support pole for the far corner. Sadly the support pole was rotting out where it was seated in the concrete. It had to be replaced and I decided that it must be replaced with galvanized square steel section. That idea then morphed into the base of a tiltover mast for a Tri-Bander antenna. The photographs below will tell the story of how the mast was actually constructed. The upper and lower sections of the mast are 6 Metres long and the lower section is 4mm and the upper section was 3mm in thickness. The bottom 3.2 metre support pole is 90mm square section. All three sections were purchased fully galvanized from a local steel supplier. There is about a 2 metre overlap when the upper section is fully extended. There are few specific measurements because the mast was designed specifically for my patio roof support but the basic principles are there. Rough drawings of the rotator mounting platform and the lugs are also shown.

Rough sketch for the mast.

Rough sketch for the mast.

Rotator Platform Details

Rotator Platform Details


Details of lug fittings all made from scrap mild steel.

Details of lug fittings all made from scrap mild steel.

Once the lower section was completed, it was bolted to the pergola roof and mounted in place to replace the old wooden pole.

The lower section mounted in place ready for the upper section. Note the 2 logs at the top of the pole where the temporary gin pole is mounted to raise the lower section up ready to insert the hinge pin.

The lower section mounted in place ready for the upper section. Note the 2 logs at the top of the pole where the temporary gin pole is mounted to raise the lower section up ready to insert the hinge pin.

You can see the mount on the top of the pole. You can also see two lugs up near the top of the pole where I attached a Gin pole. This allows me to place the top section of the mast horizontally on the ground to attach a cable from the #2 lower winch temporarily bolted to the base of the lower section. It is simple to wind up the winch and raise the upper section up to the hinge where a 3/4″ stainless steel bolt can be pushed through and secured.

The centre of the upper mast section showing the lifting lug above and the hinge lugs below. of course, all exposed raw steel was painted with galvanizing paint before mounting in place

The centre of the upper mast section showing the lifting lug above and the hinge lugs below. of course, all exposed raw steel was painted with galvanizing paint before mounting in place


This is the lower mast pulley at the top of the lower mast. It is of Ocean Yachting grade and NOT cheap plastic as are all the pulleys. The long bolt is only temporary and a shorter one was used in final assembly.

This is the lower mast pulley at the top of the lower mast. It is of Ocean Yachting grade and NOT cheap plastic as are all the pulleys. The long bolt is only temporary and a shorter one was used in final assembly.

Due to the upper and lower square mast sections having a considerable "Gap", we welded in 1/8" "Shims" on the four sides of the upper mast to prevnt a lot of side play and rotation of the upper mast within the lower mast.

Due to the upper and lower square mast sections having a considerable “Gap”, we welded in 1/8″ “Shims” on the four sides of the upper mast to prevnt a lot of side play and rotation of the upper mast within the lower mast.

The upper section is then horizontal and tilted over ready to attach the rotator and mount the antenna. The Gin pole is then removed and the #2 winch cable is attached to the end of the upper section and the mast can be moved from horizontal to it’s vertical position. The winch cable and winch is then unbolted and removed after the upper mast is secured to the lower mast. It isn’t obvious from the photos but the extender cable is routed as follows:  Cable goes from #1winch to top, over the pulley, down inside the mast in the spaces between the upper and lower sections to the bottom pulley, The over the smaller lower pulley and back up to top of bottom section where it emerges and is anchored with a bolt! The smaller #1 winch, when wound extends the upper mast to it’s full 30+ feet in height with about a 2m overlap.

Looking at the bottom of the lower mast with the bottom of the upper mast fully inserted. Not the pulley which allows the #1 winch to crank up the upper section.

Looking at the bottom of the lower mast with the bottom of the upper mast fully inserted. Not the pulley which allows the #1 winch to crank up the upper section.

Although the mast is self supporting, I have attached 3 x 3/16″ nylon guy ropes to prevent swaying in heavy winds. The mast has withstood 120 Kph gusts quite easily over the past few years.

Mast Hinge with 3/4" SS hinge bolt inserted

Mast Hinge with 3/4″ SS hinge bolt inserted. The upper section lifting log can be plainly seen protruding from the upper surface of the upper mast.

I decided to mount the rotator on it’s own platform and sleeve which fitted over the top of the upper mast section. It is simply secured with a couple of bolts which allows the rotator to be easily removed for service.

Rotator and sleeve assembly.

Rotator and sleeve assembly. The #1 winch for extending the mast is shown mounted on the lower mast section. The plate for the #2 temporary winch is shown further down the mast section.

Sleeve, rotator and antenna mast in place ready for a Hex beam. Note the halyard pulleys and shackles ready for mounting and raising other wire antennas and attaching the guy ropes.

Sleeve, rotator and antenna mast in place ready for a Hex beam. Note the halyard pulleys and shackles ready for mounting and raising the other wire antennas and attaching the guy ropes.

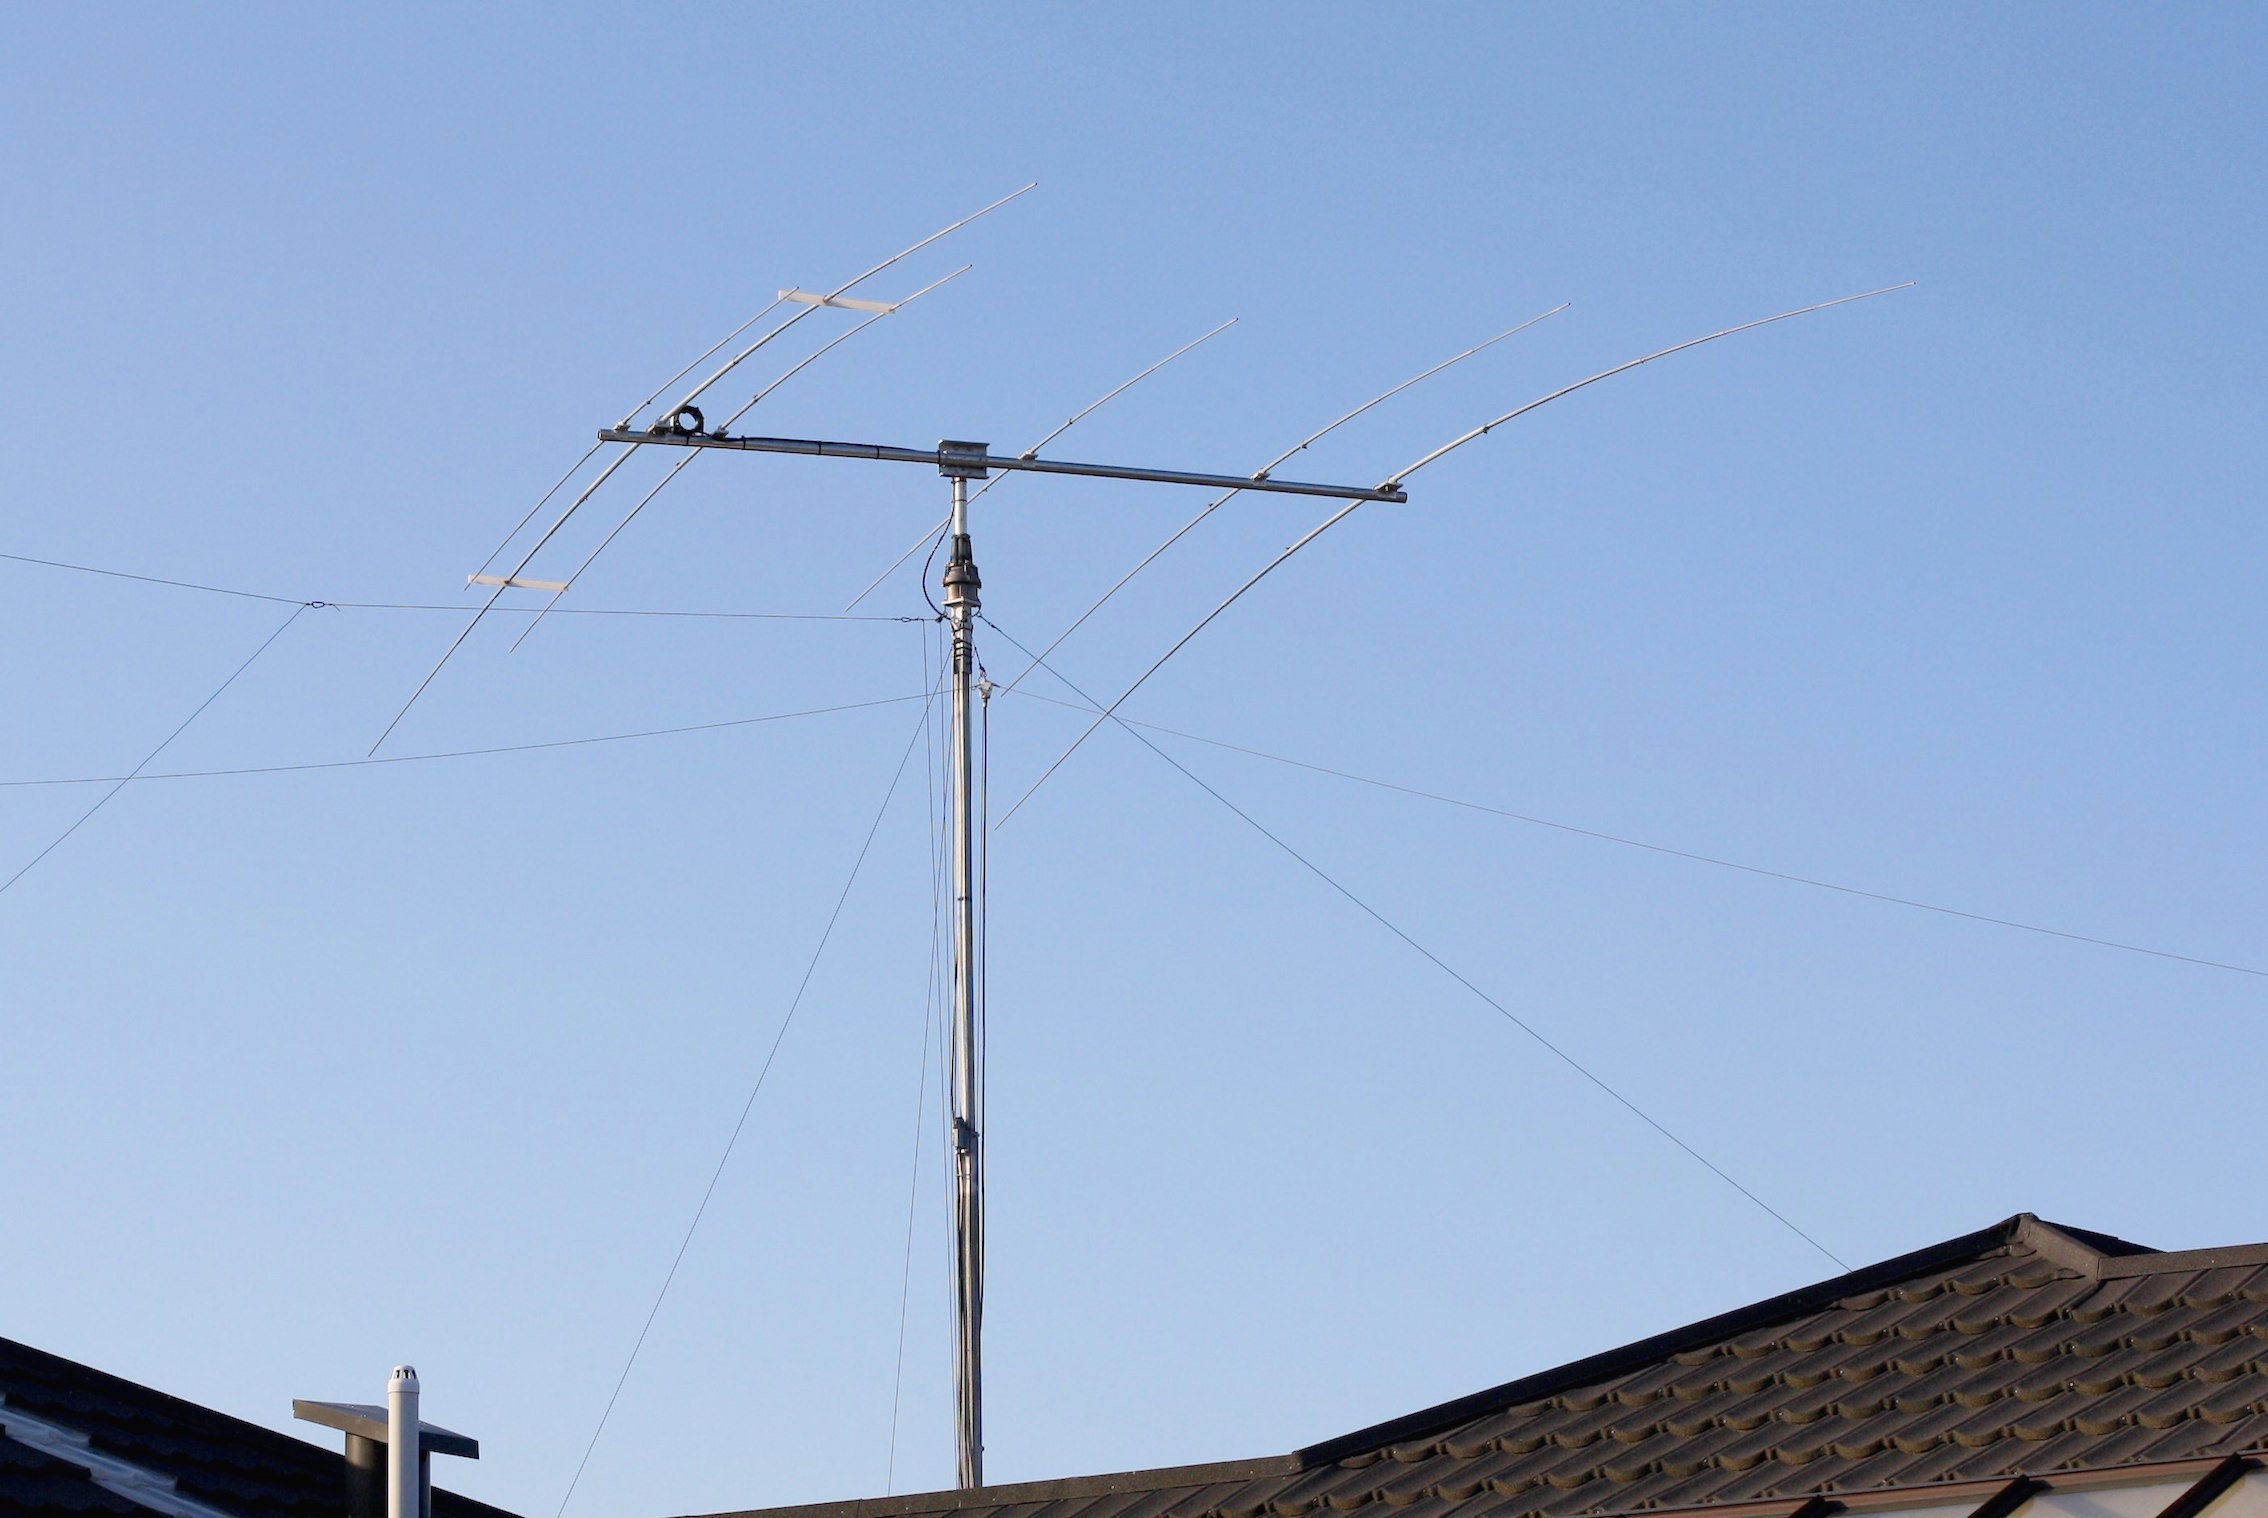
The mast originally held a Hex Beam which works well for several years until it fell apart due to the harsh Hawkes Bay U.V. sunshine perishing the nylon cable ties which held the element wires in place. I decided at that point to built a copy of the Force 12 C3S which would be light, cover 5 bands with no traps and would give reliable service for many years. the story of the C3S construction is here Force 12 C3S in another section of this website. The C3S has been a great performer for me.

Original Hex Beam in place on the new mast.

Original Hex Beam in place on the new mast.

ZL2AO and ZL2TJ finishing the mounting of the Force 12 C3S ready to raise in place.

ZL2AO and ZL2TJ finishing the mounting of the Force 12 C3S ready to raise in place.

Mast raised in place with the new copy of the Force 12 C3S.

Mast raised in place with the new copy of the Force 12 C3S.


The mast has been an interesting project. I have some basic welding skills but my mate Morrie, ZL2AO is an engineer and knows what must be done to make sure a mast of this size stays intact while raising it and stays in place in high winds. He did all the welding for me.

The final antenna is shown in place in the photos below. Morrie and Carl helped me put the antenna in place on the top of the mast. 36′ elements are a lot to contend with the antenna on the ground in your back yard while trying to avoid trampling plants in your wife’s flower garden!!!! The whole project took a lot of time but not a lot of money. The total cost for the mast was around $650 USD and the C3S yagi was about half that price.

73 de Lee, ZL2AL

Universal Balun

Baluns may be would in all sorts of configurations to change impedances and change input/output line feeds. One of the two most popular baluns are the 50 Ohm Un-balanced to 200 Ohms balanced configurations. The other is the 50 Ohms un-balanced to 50 ohms balanced configuration. The first balun 50 Ohms to 200 ohms are often used to feed Of Centre Fed dipoles and G5RV and antennas while the second balun 50 ohms to 50 ohms simply provides a match and keeps RF off the feedline. Both configurations require the same initial toroid and windings to cover to HF bands from 3 t0 30 Mhz with little actual loss.

One toroid wound the same but connected differently for two different applications.

One toroid wound the same but connected differently for two different applications.

The photo shows how the windings are wound on the toroid which must be robust enough to handle 1KW and be wound with fibreglass tape to prevent the copper windings digging in on the edges of the toroid and shorting a few windings or arcing into the ferrite toroid under higher power transfer.

The finished toroid Balun ready to to be sealed in it's plastic box and connected into the dipole antenna

The finished toroid Balun ready to to be sealed in it’s plastic box and connected into the dipole antenna. This particular version used 16 Turns of #14 wire evenly spaced around the  T-43 ferrite core. The core was 55mm in diameter and 20mm thick. Amidon in the USA and many other suppliers around the world sell them.


The finished balun should be put into a suitable plastic box sealed from weather and rain with suitable connections to each leg of the dipole and and with an SO-239 socket for the coaxial feedline.

Baluns are not difficult to wind and are very much less expensive than buying a commercially made unit.

73, Lee ZL2AL

Miracle Antennas

Over the years every ham has read the advertisements about the various incantations of various types of vertical antennas. “Pick me, pick me, pick me” they all shout. And of course they are backed up with the usual testimonials. Published gain figures are dubious as they are often compared with antennas we have never heard of at locations that don’t exist. Of course we can always search eHam reviews to get a better idea of what any given antenna is like. Even after you have done your research and made your purchase, your results will vary as your soil will be different, your height above ground, whether or not you have used radials and the list goes on. The other variable that cannot be underestimated is the skill of the op. A really good op using a poor antenna will usually outperform an unskilled op using a great antenna. Indeed – mileage does vary.

One local trader on our main NZ trading site is currently listing OCF (Off Centre fed) Windom antennas and making outrageous claims in his advertising pitch to get you to buy his antenna. The vendor suggests that we look up K4(Callsign withheld). I have just researched the DXCC lists and he appears NOWHERE on any recognized DXCC or CQ listings in any mode. If the antenna works as well as he says it does, he would have the plaque on the wall. Surprise, surprise. “Work 200 countries in a weekend” sounds good when you read the advertising copy. It would be foolish to believe that the antenna would do it for you.

At the end of the day, the OCF antenna actually does work OK but uses a bit of jiggery pokery to the lengths of each side and a few well placed ferrite cores to make you think that it is more than a dipole. It isn’t a dipole as we all know! It is a dipole of suspect parentage.

Advertising is advertising. Claims are claims. Our trader is using the same techniques that the purveyors of women’s anti-wrinkle cream use. It is the same language that Proctor & Gamble have used since the last century to sell toothpaste, which after all is simply cream and a bit of abrasive that makes you feel good when you blind the women you are chatting up in the pub. And visa versa.

Over selling radio antennas is the not the sole domain of our trader. Gotham Antennas in the USA sold untold 23′ lengths of aluminium in the 1950s. Man, you were nowhere until you had a Gotham vertical. “Work the world with a Gotham vertical” was the slogan And did it work; just ask the man who owns one. (It did, after a fashion if your put attached radials and mounted it above the garage roof and used an antenna coupler. Sorry, you don’t get that info in the ad!!)

Original Gotham Advertisment in the 1950s

Original Gotham Advertisment in the 1950s

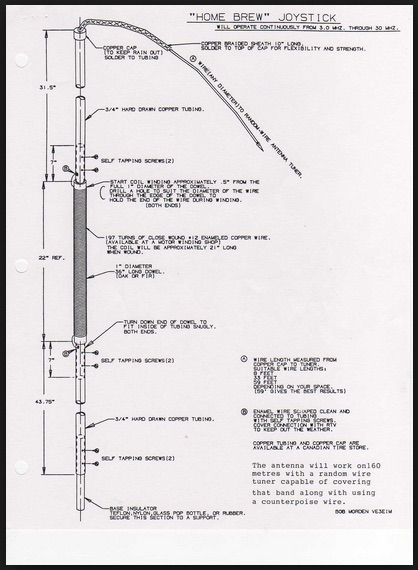
The USA was not the only country that they had the ultra compact answer to the 4 el full size yagi. The Partridge Manufacturing Company in England marketed a 6′ tube wound with wire indoors in the corner of the shack that they said would outperform anything. And of course the testimonials where there on the page to backup their claims. And of course, thousands of hams around the world bought the “Joystick” but there wasn’t much joy after you paid over your money. Just a pain in your bank account.

A home brew version of the "Joystick"

A home brew version of the “Joystick”

An original "Joystick"

An original “Joystick”

So the cry is “lynch the trader, hang em high and bring out the Fair Trade Act”. Being drawn and quartered at least would satisfy our thirst for blood.

Is this going to stop the vendor from printing his advertising crap? I doubt it. What will stop this sort of thing is every club that has newcomers to the hobby making sure that the vendor’s products and claims are well known at club level. Clubs and locals have contacts with most new amateurs and can do that. It comes back to what I mentioned a few months ago about mentoring the newcomers, getting close to them, advising them that antennas can be made that will work well for a fraction of the price.

What I am saying here is to look at the adds, do your research and the ask around in your amateur community for opinions and what they use. It wont be long before you will realize that you don’t get something for nothing in this antenna business. Gain is hard won by plenty of resonant wire or alloy up very high and rotatable.

Complaining about rogue traders in the ham section of eBay or Trade-me and burying your head in the sand with newcomers is not smart which is why these traders survive. They may not get a lot of repeat sales, but he survives. I won’t discuss pricing, as that is a whole new can of worms that I have no intention of opening except to say that every trader must make and is entitled to a profit to stay in business either on turnover or markup. Oil companies do it on turnover and jewellers do it on markup.

At the end of the day… it is and always has been Caveat Emptor. As experienced capable amateurs, we can mentor newcomers and cut down on this sort of trading abuse.

DX IS!

73, Lee ZL2AL

Refurbishing Trap Antennas

Refurbishing Old Trap Antennas

Hygain, Mosley, Cushcraft and others use traps to get the antenna to perform on several bands. In principal, trap antennas are still a very good compromise antenna for a compact multi-band design. But in time, the traps deteriorate and problems arise. The owner usually buys another antenna and sticks the old antenna underneath the house in a disassembled state where it deteriorates further. At the extreme end you end up with a pile of traps, with no labels or part numbers and with the plastic end caps cracked and quite useless. Worse, you have no idea what frequency that traps actually resonate on and whether they should reside on the director, reflector or driven element.

Trap resonance
The manufacturers rarely design a trap to resonate where you think that they will resonate. A 15M trap that you may think should resonate on 21,200 Mhz will often be designed to resonate around 20.500 Mhz. Why? If the trap resonated in the middle of the band, then extreme voltages would exist at high power levels which will warm the trap and cause arc-overs to damage the trap. When the trap design resonates below or above the antenna design then those voltages are not a problem. You can research the Hygain trap frequencies on the internet. Typically 13.6 Mhz, 20.6 Mhz and 27.4 Mhz are common. Think about it. The length of the elements determine the resonance of the antenna, not the traps! A common trap (if you will pardon the pun).

Trap maintenance
Traps are assembled in the factory and can be disassembled. That’s a given. HyGain put a little dimple in the aluminium outside cover to hold them in place. The dimple may be drilled out and the trap coil will slide out of the outside cover. A little more theory here: The outside cover is actually the capacitor for the trap. The air spacing to the coil is the dielectric, or insulator. After the trap cover is removed from the coil you will see the ends of the aluminium wire joined to the tubes with a set screw. It is almost a certainty that the galvanized steel screw is corroded and the connections will be compromised electrically.

Now is the time to do something about it. Clean the wire loops, clean the tube surface that they touch and fit new stainless self tapping screw with star washers which will bite into the metals and make good contact. Before the coil is slid back in the shroud capacitor, take a stiff brush and clean the trap and end tubes in the kitchen sink with a good detergent. You will have purchased a set of new end caps from the manufacturer and now the traps may be re-assembled good as new.

There is a drain hole in each shroud. Make sure they are facing down when the antenna is up on the tower. A trap full of water will cause major embarrassment to the owner and is a source of great amusement to the next door neighbour when it is on fire! If you decide to use a balun, be aware that the standard HyGain BN-86 balun is not a good choice if you run 1 KW. They fail. They are fine at 500W. They should be mounted BELOW the boom, not above. And make sure you enlarge the drain holes when you check the internal soldering connections.

Trap Resonance
I have already discussed resonance above, but how do you determine it’s resonant frequency? The shroud, being a capacitor of under 50 Pf in value is very susceptible to surrounding objects which will detune the trap. The best way of measuring a trap frequency is to tie a loop of thin nylon fishing line around each end tube of the trap and hang it from the ceiling so it is in free space about stomach level ready for measuring. Then use your grid dip meter with its coil end on to the end of the trap tube about 10 or 15mm away. You may find that only one end will give you a resonant dip. take several measurements and get a precise average.

Don’t hold the GDO. Stack some boxes or a chair or whatever to get it in that position so you don’t have to hold it. You simply have to adjust the GDO looking for the dip. And it will be a challenge to find the dip because the “Q” of the trap assemble ywill be around 300 and the dip will be minuscule and very sharp and very easy to miss. Eventually you will find it. Write the frequency on the shroud with a pencil and move on to the next one. You will eventually will have 6 traps in pairs. Some traps will have different end tubes on them and you will know where they go. Download the manual and study it. Eventually it will make sense and you will be able to sort out what the trap is you have in your hand that has no label.

Antenna re-assembly
Where tubes fit into each other and fit into traps, the aluminium must be cleaned and shine for a good electrical connection. Elbow grease and steel wool will do the job. The insides of the tubing may be cleaned with a round file or a rifle bore cleaner. Old tubing clamps should be disguarded and replaced with new stainless steel clamps. Finally, a very fine coating of UTILUX jointing compound (Most electrical wholesalers have it in stock) or the like should be applied to the tubing surfaces before clamping.

An antenna refurbished and repaired in this way will give many more years of service. I have refurbished several HyGain TH3s, TH4s and TH6s this way and they worked as good as new.

73, Lee ZL2AL

“Wabun” – The Japanese Morse Code

“WABUN” – THE JAPANESE MORSE CODE (QOD6), MAI, JH1JDI – FISTS #15123

I like to QSO using QOD6, the Japanese Morse codes, so-called “Wabun CW”. “Wabun” means “Japanese language” in Japanese generally and “CW communications in QOD6” especially among Japanese HAMs. The reason why I like Wabun CW QSO is that we can communicate with in Japanese language even in CW mode. According to “Directory of Wabun CW Stations”, published in August, 2013, by an amateur society of Wabun CW fans, there are around 3900 amateur radio stations operating Wabun CW in Japan. If remember Wabun morse code (QOD6) it is easier for Japanese CW men to send what they want to say and to hear what the other stations want to say because Wabun communications are done in their mother tongue.

In Japan, it seems that there are mainly three types of CW QSOs. The first type is “599 BK” style, the second one is chatting using QOD1 (in English) and the third one is chatting using QOD6. The Wabun CW QSOs are popular in 80mb and 40mb, plus 144MHz band, because of the characteristics of the propagation. Both 80 mb and 40mb are so suitable to contact with stations all over Japan, from Okinawa (JR6) to Hokkaido (JA8), and 144MHz band is for radius of within 150km. Many Japanese CW stations using Wabun are on the air especially between 3515k Hz and 3525 kHz, 7015 kHz and 7025 kHz and around 144.070 MHz.

A marker of Wabun is DO and SN. DO means “from here QOD6 starts” and SN means “QOD6 has ended”. The way to call CQ for Wabun CW is “CQ CQ CQ DO DE (callsign)”.

Example
JH1JDI: CQ CQ CQ DO DE JH1JDI JH1JDI K

JA1QRZ: JH1JDI DE JA1QRZ K

JH1JDI: JA1QRZ DE JH1JDI DO (sending Wabun) SN JA1QRZ DE JH1JDI K

JA1QRZ: JH1JDI DE JA1QRZ DO (sending Wabun) SN JH1JDI DE JA1QRZ K

Now the Wabun CW QSO is not so popular even in Japan because it is necessary to remember QOD6 newly. This makes Japanese HAMs to spend more time to remember more than 50 codes and they don’t have any connections with QOD1 English codes. That is, “A” of Wabun is “–.–” and “KA” is “.-..”, “SA” is “-.-.-“, they are not simple combination of codes of A, K, S and so on. These complexity and illogic come from characteristics of Japanese writing system but it is more efficient for CW communications done in Japanese language.
Screen Shot 2014-07-14 at 12.40.55 amScreen Shot 2014-07-14 at 12.41.20 am

In Wabun CW, between DO and SN, they use comparatively formal literary style of Japanese language and there are almost no abbreviations in QOD6 for amateur stations, although there were for professional stations.

Example
QOD1: BT GA UR 579 57N QTH HR TOKYO WX FINE ES TEMP 25C MI NAME MAI HW? AR

QOD6: (in Japanese) DO Good afternoon and thank you for your calling me. Your signal comes with 579 57N to Tokyo. Now regarding weather here, it is fine and temperature is 25 degrees. My name is MAI. SN

Most of stations chatting in Wabun are relaxing and having good time, without any dog piles or getting results in recording number of log entries of stations contacting with them.

Because of the direction of interest of general Wabun QSO, they usually take at least 10 minutes for one QSO. I also chat for about an hour with a station. So some stations don’t like Wabun QSO even if they can use Wabun codes. They say that they don’t like Wabun very much because it takes much more time for one QSO comparing with “599 BK style” short-short CW QSO.

And the other sometimes says that Wabun QSO should not be on the air since it is domestic codes, not international ones and it is a kind of “cryptogram” for non-JA stations and even for JA stations, if they can not use Wabun.

There are many opinions both for and against about QOD6 Wabun QSO in Japan, but I think Wabun is to be estimated correctly and not to be forgotten. Because QOD6 is one of precious properties especially for Japanese CW men. During 2014, I am writing a monthly article about Wabun

CW QSO course on monthly magazine “CQ Ham Radio” published in Japan. The target is from introduction, through the learning and training, to enjoying Wabun CW QSO for whom being interested in it but not having started it.

From ASIA FISTS Newsletter written by Mai, JH1JDI

NZART AGM 1929

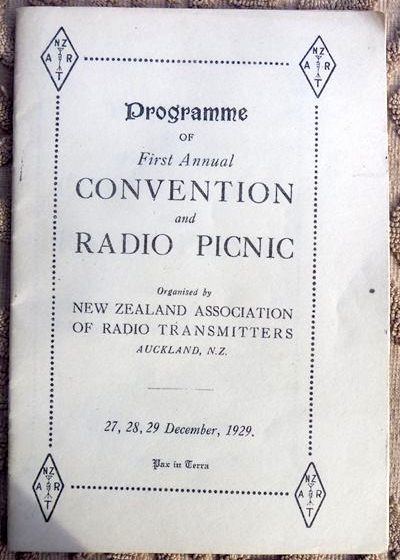
These delightful images of the first ever NZART AGM program in 1929 are quite interesting. It was a far different world then in 1929. The stock market and the world financial system had collapsed and the beginnings of the great depression were probably being felt in New Zealand too. I wonder if that affected the attendance figures? They had no comparison as this was the first Convention.

Programme front cover from 1929

Programme front cover from 1929

The affair was a combined Convention at the Royal Akarana Yacht Club rooms in Auckland on Saturday the 28th and a Picnic excursion to Motuihi Island on Sunday the 29th. Hams and their families were being met at the station after arriving by train on Thursday the 26th. Friday appears to be a sightseeing trip around Auckland by bus and the highlight was a visit to 1YA, the Government’s flagship broadcasting station. No commercial radio in those days! It looks like a major sponsor was Spedding Ltd who appeared to have had the import agency for Mullard Valves and Burgess batteries. That would be a licence to print money in those days as everyone who had a radio needed batteries and valves and you couldn’t order them from an eBay seller.  I remember seeing the Spedding name in 1969 when I first arrived in New Zealand. But that was along time ago and perhaps I am imagining it.

Was a "Pentone" valve a pentode?  25/ for a valve seems reasonable!

Was a “Pentone” valve a pentode? 25/ for a valve seems reasonable!

The Saturday Night dinner must have been a grand affair for those particularly fond of Grid Leak Soup and Spaghetti tubing. Nice that they opened the dinner with a toast to the King. Those were the days when the King was held in awe. At the beginning of any screening at a picture theatre, all would stand and sing “God save The King” and all were dressed to the “nines” That era in the movies was the beginning of the “talkies” as it was silent films up until then.

What a grand Affair this was!

What a grand Affair this was!

Interesting that NZART was discussing matters of vital importance relevant to the welfare of radio amateurs throughout New Zealand. 85 years later and NZART is still looking after our best interests. I wonder if there was much debate at that meeting and if any got heated?

And there was the picnic to look forward to!

And there was the picnic to look forward to!

The Picnic must have been an energetic occasion. You wouldn’t get away with running an “Old Woman’s Race” in this politically correct world we live in 85 years later!

The Water Melon eating contest kinda appeals to me!

The Water Melon eating contest kinda appeals to me!

Since then our association has survived hard times, wars, good times, tragedies and the massive changes in technology we are privileged to use today. NZART has grown, changed and serves us well some 85 years later. I wonder what the Programme will look like for the upcoming 2099 NZART Conference?

73, Lee ZL2AL

Rebuilding Aluminium Antennas

I’ve rebuilt a lot of HyGain and Mosely antennas over the years and recently built a copy of a Force 12 Tribander from assorted scrounged corroded tubing. Aluminium corrodes over time and it’s a problem. There are a few things that you can do to take the work out of corroded tubing.

1) Most hardware stores and some engineering supply companies have a 3M product which fits into an electric drill chuck. The abrasive wheel part is a course raspy hard synthetic wheel designed to remove paint. It comes with it’s own arbour shaft and the abrasive wheel is about 120mm diameter and about 30mm thick. It takes all the work out of restoring the outside of any badly corroded alloy tube. One wheel will last long enough to restore the shine to most 3 or 4 el.

2) The second problem is cleaning the inside end of tubing. You just can’t get at it easily and you need to so that good quality contact is made with the next tube that slips inside. I solved the problem by going into a gun shop and buying 2 brass wire brush rifle pull throughs normally used to clean barrels. They are about 90mm in length with brass bristles and have a 1/4″ shaft. The small one will clean the inside of 3/8″ up to about 5/8″ tubing. The larger one for a 12 gauge shotgun does the larger tubes. To use them, I soldered on a 6″ long, 1/4 dia shaft extension onto the pullthrough shaft and put the shaft in a cordless drill running at slow speed. it works a treat and the tubing insides are sparkling clean!

3) For the past 20 years i have used a electricians conduction compound made by Utillux It’s P/N is H-2397 Jointing Compound. It preserves and conducts between the metal tubes. Brilliant.

4) I don’t rely on clamps any more. Although I use them and tighten them, I also use 1/8 Pop rivets in the same way that Force-12 do to secure the elements in their antennas.

5) Have a look at /3219/building-a-multiband-yagi/ on my website and you will see some ideas for clamps. The standard muffler clamps drove me crazy for years. I don’t use them now. I don’t have to endlessly pull the antennas down re-tighten the clamps any more and the elements stay where they should be for years.

73, Lee ZL2AL

The iKeyPad

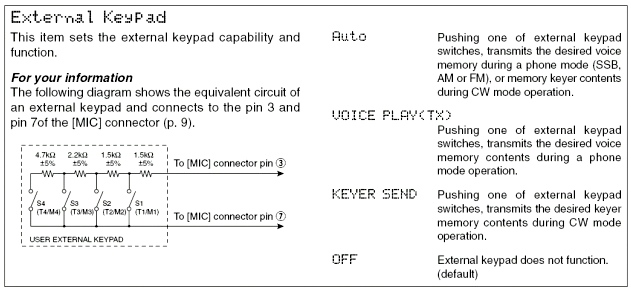
The Icom series of radios from the IC-746 Pro on to the latest 7800 radios have a 4 memory digital voice and CW  keyer built into the radio. These may be accessed by using the menu to access the keyer, make your recording and using the front panel “F” keys to trigger the individual memories. Sadly, the procedure becomes tedious and rather uncomfortable during a 48 hour contest where you might press the various “F” keys hundreds of times by having to reach across your keyboard, paddle and operating desk. The back section of every Icom manual shows the circuitry for an external keypad. The circuit is consisting of 4 resistors and 4 SPST pushbutton switches and a short 2 wire connection into your microphone plug. Finding a suitable box for the switches is a problem and while looking at an old Apple mouse on the shelf the idea came to me that it’s smooth ergonomic design would be great to have my hand on for long durations of time.

The Apple mouse disassembled with switch holes drilled in upper shell. Lower shell still has circuit board and USB cable attached (All to be removed)

The Apple mouse disassembled with switch holes drilled in upper shell. Lower shell still has circuit board and USB cable attached (All to be removed)

The APPLE Corporation under CEO Steve Jobs were designing some beautiful computer gear years ago and this old mouse was a product of that era.

It was easy to use a small thin bladed screwdriver to lever a few tabs and the mouse fell apart in pieces. Discard the circuit board and USB cable which leaves you with a shell and a base. Find 4 suitable tactile easy to push SPST switch push buttons. The electronics parts suppliers have many types to choose from. The red button is for memory No.1 The quality of the plastic is very good and is not prone to splitting. Start the holes with a small drill bit and slowly increase the size as required. Mount the switches in place and solder the 4 resistors in place. Connect the cable with a 3.5mm plug on the end. Any old old audio cable with the plug attached cut to length will do. I secured the cable in place with a dap of glue from a hot melt glue gun. The inside of the top shell is shown below.

Upper shell with switches, resistors and new cable in place.

Upper shell with switches, resistors and new cable in place.

The upper and lower shell halves should be mated together again. A little super glue will hold them in place if you the tabs don’t align as they should. The finished iKeyPad is shown below.

The completed iKeyPad ready to use.

The completed iKeyPad ready to use.

The next thing you must do is connect a small lead from inside your microphone plug to a female 3.5mm socket so that you can plug the iKeyPad into it. Pin 3 is the resistor nework and Pin 7 is the ground for most Icom radios. The only thing left to do is go into the menu system in your Icom radio and allow the keypad feature to work instead of the microphone scan feature. Another menu item will allow the iKeyPad to operate the 4 memories on both CW and SSB modes. The original Icom circuit of the external keypad is below.

Icom Keying circuit

Icom Keying circuit

Operation is a pleasure. Accessing memories from a keypad is so much easier than pushing buttons on the front panel. The inbuilt Icom digital voice and CW keyer is a pleasure to use. The Icom voice keyer sounds absolutely natural and all audio level parameters are adjustable. Make sure the compressor control is off when you do your recordings. The cost of the iKeyPad is nearly nothing if you can find an old Apple mouse. Of course, any mouse of any brand will also work fine if the housing is suitable and comfortable.

73, Lee ZL2AL